In this article I want to explain you shorty, how you can achieve a Cupertino Date Textbox with Flutter. You can use this widget in e.g. a form within your app.
Let’s explain it with an example: The next steps will explain you how to create a birthday selection with a cupertino date box:
1. Add the library cupertino_date_textbox to your project
Luckily, there’s already a library called cupertino_date_textbox which we’ll use to create the birthday textbox.
Therefore, integrate cupertino_date_textbox into your project by adding it to pubspec.yaml:
dependencies:
  cupertino_radio_choice: 1.0.0+2
2. Usage of CupertinoDateTextBox Widget
You can use CupertinoDateTextBox like this:
CupertinoDateTextBox(
    initialValue: DateTime.now(),
    onDateChange: onDateChangeCallback,
    hintText: 'Hint Text'))
First, initialValue specifies the date which shall be displayed initially by the textbox.
Second, you can use onDateChange to pass a callback function to the widget. This function will be called if the user selects another date.
Finally, hintText specifies the text which shall be displayed if no initialValue is given.
Furthermore, there are some style options which you can use:
/// The color of the text within the text box
final Color color;

/// The color of the hint text within the text box
final Color hintColor;

/// The background color of the cupertino picker
final Color pickerBackgroundColor;

/// The size of the font within the text box
final double fontSize;

/// The inner padding within the text box
final double textfieldPadding;

/// Specifies if the text box can be modified
final bool enabled;
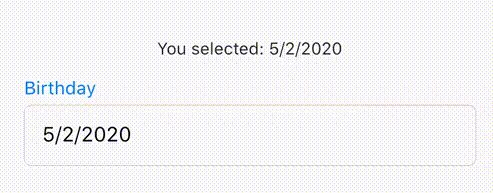
3. Create a Birthday Textbox with Cupertino Date Textbox
As you can see in step 2, it is easy to use CupertinoDateTextBox. Now it’s time to try it out with an example.
Therefore, here you can find an example how to create a birthday textbox:
import 'package:cupertino_date_textbox/cupertino_date_textbox.dart';
import 'package:flutter/material.dart';

import 'package:flutter/cupertino.dart';
import 'package:intl/intl.dart';

void main() => runApp(ExampleApp());

class ExampleApp extends StatelessWidget {
  @override
  Widget build(BuildContext context) {
    return MaterialApp(
      debugShowCheckedModeBanner: false,
      home: MyHome(),
    );
  }
}

class MyHome extends StatefulWidget {
  @override
  _MyHomeState createState() => new _MyHomeState();
}

class _MyHomeState extends State<MyHome> {
  DateTime _selectedDateTime = DateTime.now();

  @override
  Widget build(BuildContext context) {
    final String formattedDate = DateFormat.yMd().format(_selectedDateTime);
    final selectedText = Text('You selected: $formattedDate');

    final birthdayTile = new Material(
      color: Colors.transparent,
      child: new Column(
        crossAxisAlignment: CrossAxisAlignment.start,
        children: <Widget>[
          const Text('Birthday',
              style: TextStyle(
                color: CupertinoColors.systemBlue,
                fontSize: 15.0,
              )),
          const Padding(
            padding: EdgeInsets.only(bottom: 5.0),
          ),
          CupertinoDateTextBox(
              initialValue: _selectedDateTime,
              onDateChange: onBirthdayChange,
              hintText: DateFormat.yMd().format(_selectedDateTime)),
        ],
      ),
    );

    return new Scaffold(
      body: Padding(
          padding: const EdgeInsets.fromLTRB(20, 100, 20, 50),
          child: Column(children: <Widget>[
            selectedText,
            const SizedBox(height: 15.0),
            birthdayTile
          ])),
    );
  }

  void onBirthdayChange(DateTime birthday) {
    setState(() {
      _selectedDateTime = birthday;
    });
  }
}